-Concept of situating tool
On 16th of May, we were taken through situating tools which seems to be very interesting for me, Situating tools refers to the systems/applications which situate users in an environment where they may 'experience' the context and happening. Situating tools are VR (virtual realities, 3D computer simulated images experiential learning environment, simulation instructional game.
Under this, we went through various examples of situating tools.
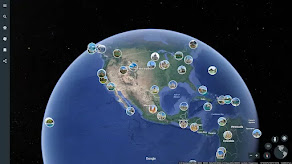
1. Google Earth: google Earth provides search capabilities and the ability to pan, zoom, rotate, and tilt the view of the Earth. It also offers tools for creating new data and a growing set of layers of data, such as volcanoes and terrain, that reside on Google's servers, and can be displayed in the view.
2. Geo-Gebra:GeoGebra is a dynamic mathematics software for all levels of education that brings together geometry, algebra, spreadsheets, graphing, statistics and calculus in one engine.
Concentration: Their main goal is to produce a lifelike experience that mimics an actual situation.
Fostering Empathy: The Situating Tool's ability to promote empathy and understanding is among its most profound features. It encourages us to view the world from a variety of angles by getting us to think about other people's points of view and the larger societal context. Our relationships with others are strengthened by this empathy, which also directs us toward more inclusive and compassionate lifestyles.
A Route to Development: In the end, the Situating Tool offers a route to development and introspection. It challenges us to see complexity, ambiguity, and uncertainty as chances for growth and change. The Situating Tool is a steady companion through life's turns and turns, pointing the way toward increased wisdom, empathy, and understanding.
Situational Tool Examples:
1. GraphCalc,
2. GeoGebra,
3. Simulation Games,
4. Google Maps
5. and Google Earth
It's interesting that I was able to use Google Earth to visit the renowned Murdoch University with just a mouse click. I then engaged in a straightforward simulation game called "bug on the wire". My best time was one minute and five seconds. Following that, we used "GeoGebra.org" to investigate GeoGebra. GeoGebra is a free interactive tool that integrates statistics, algebra, calculus, and geometry. Here's a brief summary:
Focus: Teaching and learning mathematics from elementary school to tertiary education.
Features: Enables users to create geometric objects, graph equations, carry out calculations, and graphically investigate mathematical ideas.
Benefits: Math becomes easier to comprehend and more approachable when it is interactive and interesting.
Availability: Free software is accessible through online browsers, tablets, desktop computers, and even mobile apps.
With this, we have used the subsequent procedures to produce an equilateral triangle:
1. Concept: An equilateral triangle is a three-sided shape where all three sides are equal in length and all three angles measure 60 degrees.
2. Process:
- Open GeoGebra: https://www.geogebra.org/
- Define a Point: Use the "Point" tool (usually a small dot icon) to click anywhere on the workspace. This will create a point, which will be the first vertex of your triangle. GeoGebra will automatically label it with a letter (e.g., A).
- Construct a Circle: With point A selected, use the "Circle" tool (usually a circle icon). Click on the workspace to define the center of the circle. Since you want an equilateral triangle, drag the circle outward to create a desired radius. GeoGebra will display the circle equation and label the center point (A) and another point on the circle (e.g., B).
- Intersect the Circle with itself: Select the circle tool again. This time, click directly on the circle itself (not on the workspace). GeoGebra will find the intersection points of the circle with itself, creating two new points (e.g., C and D) on the circumference.
- Connect the Points: Use the "Line" tool (usually a line segment icon) to connect points A, B, and C. GeoGebra will automatically create three line segments forming a triangle.
- Lastly to remove circles and labels, select "Move" icon and then select the circle followed by "show / hide object" and "show/hide labels". Now, you have precise equilateral triangle.
3. Product:


.png)
No comments:
Post a Comment